
A few weeks ago, I was perusing Joann when I saw a chiffon fabric with bird patterns I knew my sister would love. Unfortunately, it was $14/yard. That was ridiculous. I know Joann always mark up their prices so I waited for a sale. I got 1.3 yards for my sister and attempted to make her a split-back shirt with a bow in the back.


This shirt is incredibly simple.
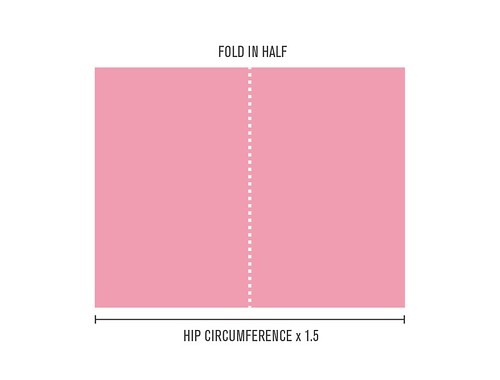
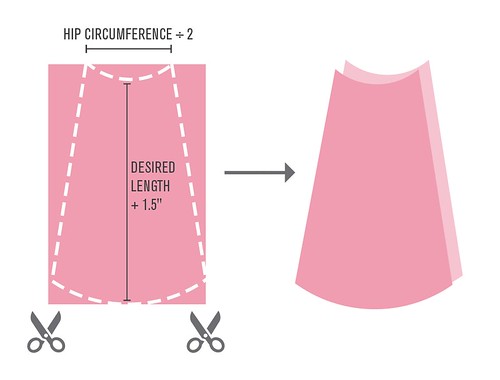
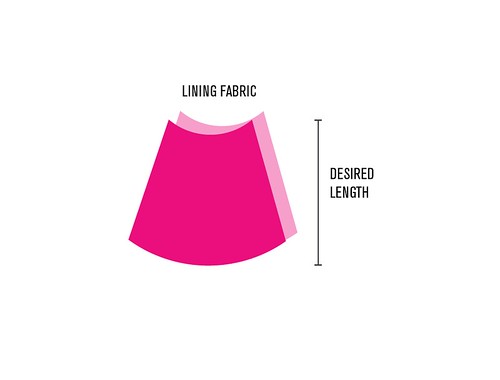
First, cut one front and one back piece in the shape of a loose tank top. Cut an A shape in the middle of the back piece.

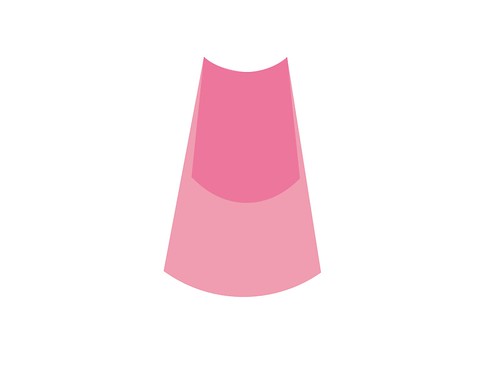
Take the top inner corners and overlap them slightly like pictured. This will allow you to sew them together and let you have a base for attaching the bow later.

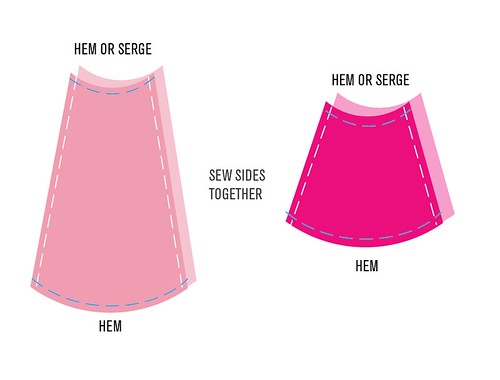
Hem the bottom, arms and neckline. Sew the two pieces together at the shoulders and sides.

For the bow, I cut TWO rectangular pieces. Because chiffon is too flimsy and will not stand on its own, I ironed on interfacing to make it stiffer. Follow the directions on your interfacing package for this step as there are different types of interfacing. Mine is fusible interfacing, which means I had to iron it on. Make sure you attach the interfacing on the WRONG side of the fabric. Do this to both pieces.

Now lay the two pieces with the WRONG sides (with interfacing attached) facing each other. Fold the sides inward and sew the two pieces together. There are many ways to do this, so do it the way you prefer. You basically just want a "closed" pillow case.

Take a small piece of scrap fabric and wrap it around the bow at the middle. Make sure it's long enough to have a small piece sticking out so you can attach it to the shirt.

Sew it to the shirt with a simple straight stitch.

Done!
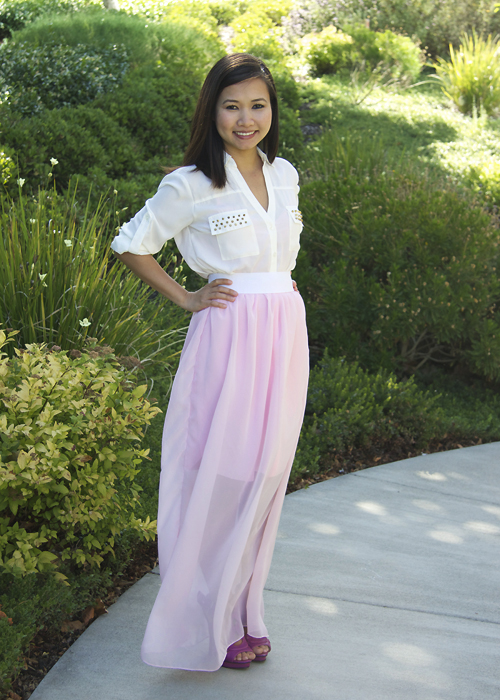
And wear it.


)


)