Jewelry Hanger & Wall Art

Wall art jewelry hanger


I hate non-functional items—anything that just sits on shelves or hangs on walls looking pretty is useless to me. That means I mostly avoid them at all cost, unless I can justify having them by giving them purpose.

That being said, when I saw this metal wall art at Hobby Lobby, I was a bit skeptical. I've been looking for another jewelry hanger for a few months now, but haven't found what I wanted at an affordable price. This wall art was on sale and I have to say, it's the best purchase I've made at Hobby Lobby so far.

Here's what it looks like before. Very simple flat-finish black. I liked the simple black, but felt it wouldn't go with my dressing room where colors were mostly white and bright.

Wall art jewelry hanger

Wall art jewelry hanger

Instead of completely taking the black away and painting it with another color, I sprayed the front with a layer of Mod Podge Pearlized Glaze. Let me tell you—the finish ROCKS, the spray bottle design SUCKS. I had to press super hard in order for it to spray. Ugh they should make their bottles like Rust-oleum.

Wall art jewelry hanger

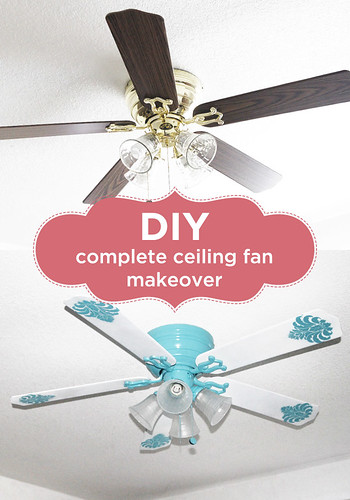
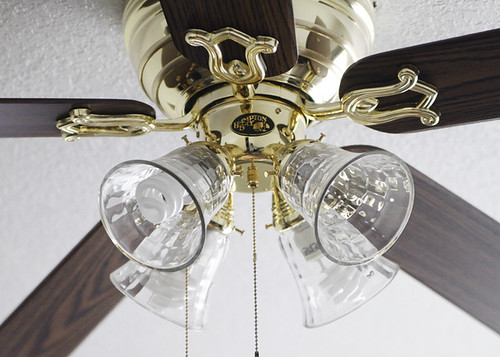
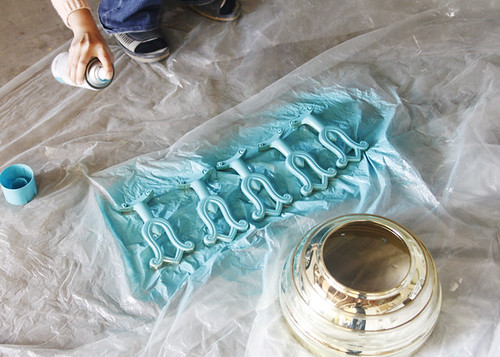
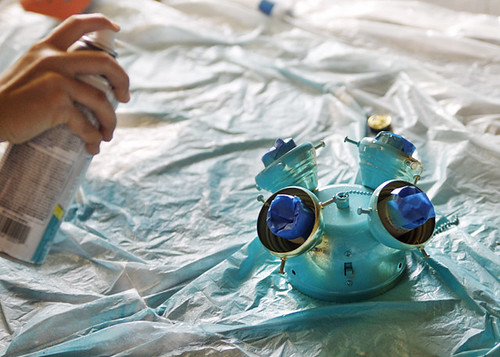
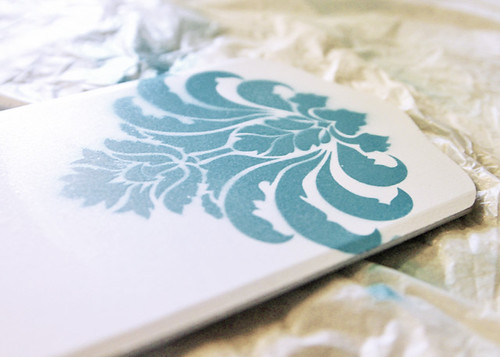
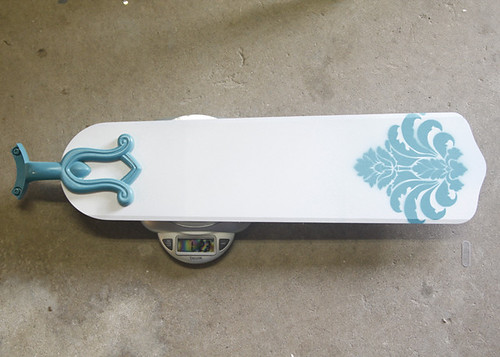
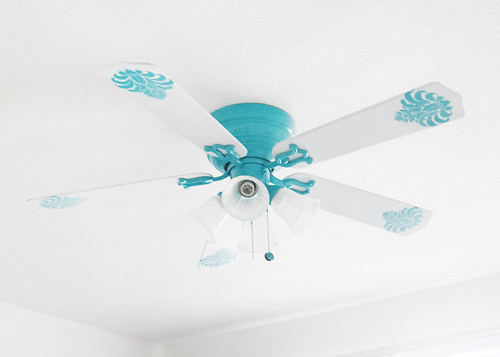
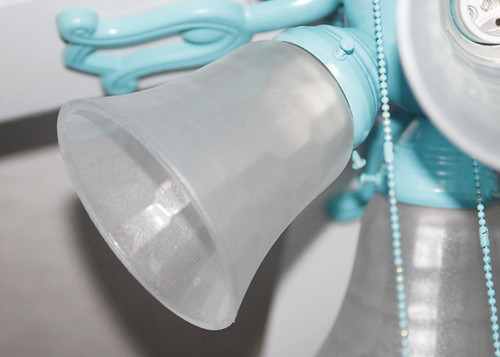
The photo doesn't do it justice. It's a subtle, yet beautiful pearlized finish. This is the same finish I used for the glass on my ceiling fan. Remember this?

_MG_2096 copy

Yup. Okay let's hang this sucker up. There were two holes built into the metal wall art to hang it on the wall. Such an easy installation and it stays on tight. I hung up all my necklaces and earrings and it looks perfect. Keeps everything in one place and takes up no real estate in my room. Awesome. Beautiful and serves a purpose.

Wall art jewelry hanger

Wall-Art Jewelry Hanger


DIY Complete Ceiling Fan Makeover

I'm on a roll. I've been doing projects like crazy. My brain is fried with too many ideas and not enough doing. Being alone and having a limited amount of dough, doing projects have been difficult. Here's a project I did without breaking the bank.


DIY complete fan makeover with spray paint

This fan came with the house I purchased. It's an eyesore because the style is too old fashion. I thought about replacing it with a new fan or a chandelier, but both cost too much money and I wanted to keep a fan for summer days. Pinterest saved my sanity once again and I found some inspiration for painting it. It's a lot cheaper this way and I can get any look I want. Let's face it, most ceiling fans have a very old fashion look. If you're like me and not willing to spend a heinous amount of money on a new fan, you're stuck with these 80s fans. BUT you don't have to suffer with this look. There is still hope.

I spent:
$3.87 on Rust-oleum Gloss Sea Side.
$3.87 on Rust-oleum Flat White.
$9.99 on Mod Podge Pearlized Glaze.
$5.99 on a floral stencil (I can't find the link to this, but I got it at Hobby Lobby).

Here's the old fan. The glass is clear and I wanted it more frosted. I think the frosty look will make the whole fan less stark and more soft.
_MG_1975 copy

Take apart your fan and wipe it clean. The top of mine was seriously dusty.
_MG_2025 copy

Spray the glass with Mod Podge Pearlized Glaze. This gives the glass a frosted and pearly sheen.
_MG_1977 copy

Spray the blades with two coats of Rust-oleum Flat White spray paint.
_MG_2030 copy

Paint all the metal parts with two coats of Rust-oleum Sea Side spray paint. Ignore the socks-and-sandals combo. O.O
_MG_2043 copy

Make sure you tape all electrical parts so the spray paint doesn't touch it. Also wear a mask and gloves. I didn't do this and ended up with a lot of dust in my nose and paint on my hands. NOT GOOD.
_MG_2059 copy

Put the stencil on top of the bottom of the blade and spray paint it with the Sea Side spray paint.
_MG_2069 copy

When all the paint is dry, WEIGH the blades. This is extremely important as too much difference between the blade weights will result in imbalance when the fan is in motion. Two of my blades came out to be 1 lb 2.3 ounces. Three blades were 1 lb 2.2 ounces. If some of your blades are lighter than others, spray paint a very thin coat on a small part of the blade to add a bit of weight.
_MG_2072 copy

FINALLY, put all your parts together! How pretty is this??
_MG_2077 copy

Close up of the glass. It's so beautiful. I love it!
_MG_2096 copy


DIY paint Ikea lamp shade with two patterns

I purchased a pair of Ikea lamps a few months ago. I loved the color, then I changed my mind. They also don't go with the rest of my room. I spray painted these, each side with a different pattern so when I'm tired of one pattern, I'll just flip it over and add a new look to my room.


_MG_1986 copy

Here's the old lamp shade.
_MG_1872 copy

I sprayed painted the front and back sides with a light blue and the two sides with a turquoise.
_MG_1907 copy

Wait until all sides are dry. Then use painter's tape to make chevron patterns on one of the larger sides of the lamp shade. I made mine imperfect with small and large lines.
_MG_1912 copy

Spray paint it a different color (in my case, I used the turquoise since that side of the lamp shade was previously painted light blue).

On the other side, use a stencil pattern of your choice. I used one from Hobby Lobby for $6. Be prepared to throw this away after a few uses because stencils are very flimsy and difficult to clean, no matter what the advertisement says.

Here are the final results. It's just one lamp shade with two different patterns on the front and back.
_MG_1986 copy

_MG_1990 copy

_MG_1988 copy

P.S. I made the splatter on the sides more noticeable because I like the texture. It adds dimension. :)

Please comment and pin :D